假设这张usb网卡作为LAN口,由于这个网段随意,只要不和WAN网段有重合即可
1
docker network create -d macvlan --subnet= 10.10.10.0/24 --gateway= 10.10.10.1 -o parent = enx98fc84e631d8 maclan
自带的以太网作为WAN口,设置网段为上级路由器同一个网段即可,网关指向路由器
1
docker network create -d macvlan --subnet= 192.168.30.0/24 --gateway= 192.168.30.1 -o parent = eno1 macwan
注意,这里只是创建了虚拟网络,他们负责给容器分发ip地址。 使用docker-compose可以写成
 1
 2
 3
 4
 5
 6
 7
 8
 9
10
11
12
13
14
15
16
17
networks:
  openwrt_maclan:
    driver: macvlan
    driver_opts:
      parent: enx98fc84e631d8 # 对应桥接的usb网卡
    ipam:
      config:
        - subnet: 192.168.10.0/24
          gateway: 192.168.10.1
  openwrt_macwan:
    driver: macvlan
    driver_opts:
      parent: macwan # 对应桥接的网卡
    ipam:
      config:
        - subnet: 192.168.30.0/24
          gateway: 192.168.30.1
具体参数信息请查看docker官网
https://docs.docker.com/compose/compose-file/06-networks/
 1
 2
 3
 4
 5
 6
 7
 8
 9
10
11
12
13
14
15
16
17
18
19
20
21
22
23
24
25
26
27
28
29
30
version: '3'

services:
  openwrt:
    image: piaoyizy/openwrt-x86
    container_name: openwrt
    privileged: true
    restart: always
    networks:
      openwrt_maclan:
        ipv4_address: 10.10.10.6 # LAN口的IP,连接到此网卡的设备可以通过该ip访问openwrt后台
	  openwrt_macwan:
		ipv4_address: 192.168.30.99  # WAN口的IP
networks:
  openwrt_maclan:  # 虚拟网卡1
    driver: macvlan
    driver_opts:
      parent: enx98fc84e631d8 # 对应桥接的网卡
    ipam:
      config:
        - subnet: 10.10.10.0/24
          gateway: 10.10.10.1
  openwrt_macwan: # 虚拟网卡2
    driver: macvlan
    driver_opts:
      parent: eno1 # 对应桥接的网卡
    ipam:
      config:  # 注意WAN口的网段要和路由器的相同,否则无法联网
        - subnet: 192.168.30.0/24
          gateway: 192.168.30.1
参考:
https://kingtam.win/archives/docker-openwrt.html#login
1
2
ip link set enx98fc84e631d8 promisc on
ip link set eno1 promisc on
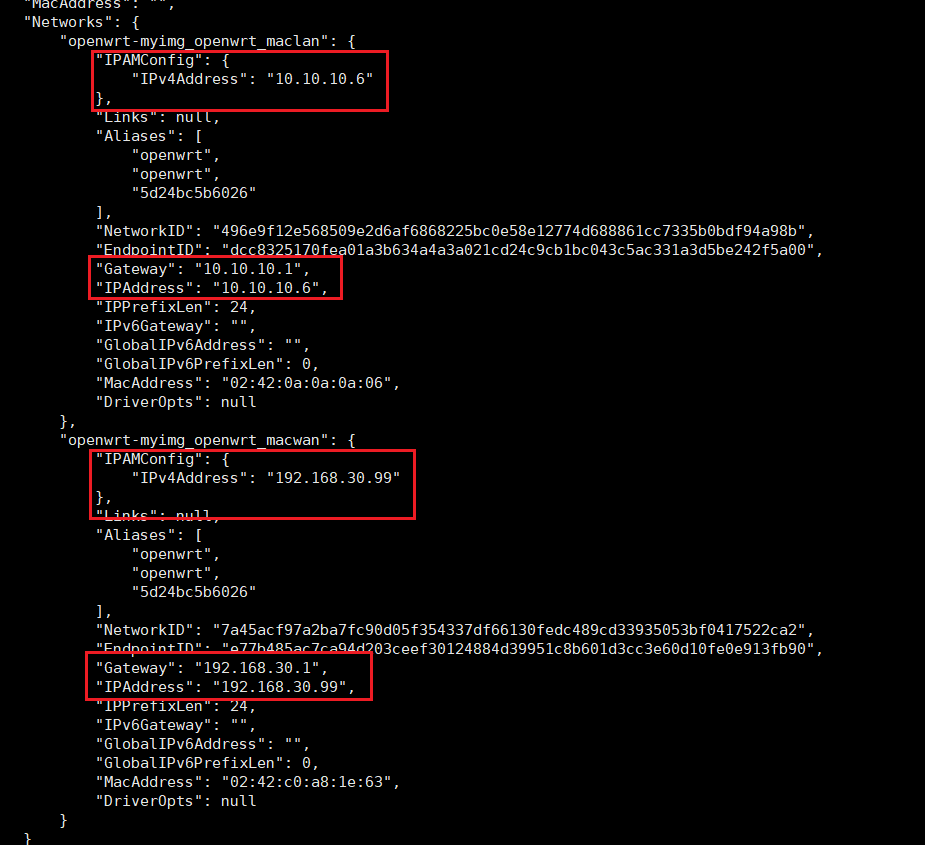
启动后,可以查看下容器的网络情况
这里笔者感到疑惑,明明同样的设定,openwrt是怎么区分LAN和WAN的呢?笔者的猜想是,到目前为止,openwrt并不能区分LAN和WAN,而是我们自己设置LAN和WAN。 注意,这里虽然给容器设置了macwan的ip地址192.168.30.99,但是此时查看路由器后台是没有看到192.168.30.99设备接入的!即便你把macwan的subnet设置成172或者甚至不设置subnet,都不影响openwrt与路由器的通信,也就是说,即便你macwan的IPV4Address地址是172.17.0.2,openwrt照样可以使用DHCP客户端向路由器申请192.168.30.0/24的有效IP地址。 进入容器
1
docker compose exec openwrt ash
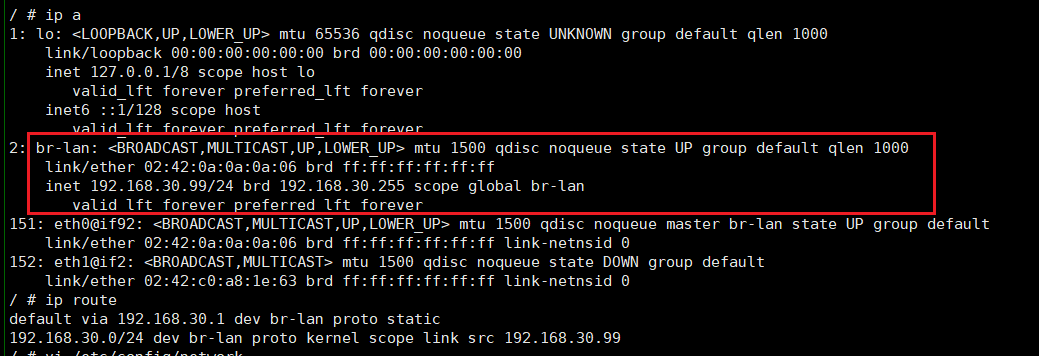
通过ip a 发现,lan并非是我们预期的10.10.10.6,而是被设置成了192.168.30.99(这是因为我之前编译openwrt的时候加入了自定义配置uci set network.lan.ipaddr=192.168.30.99,默认情况下是192.168.1.1,不同的作者编译的固件其静态ip不一样,但无论是哪个ip,这都不是我们想要的10.10.10.6,因此我们需要手动设置一下
固件编译时的自定义配置,默认是192.168.1.1 ip a查看到openwrt默认给虚拟USB网卡设置成了LAN/etc/config/目录下,包括防火墙和各种应用的配置,对于接口ip地址的设置,有两种方法:
方法0:编译前就设置,显然这个固件已经编译好了,这个方法在此处无效。 方法1:直接修改/etc/config/nework 方法2:通过操作系统API uci set network.lan.ipaddr=10.10.10.6,然后执行uci commit ,这两句执行完成后,设置会被写入到/etc/config/network 指定ip创建容器的时候,虽然docker会给容器分配ip地址,但是openwrt会对网卡做出以下默认初始化操作
让LAN自动设置为静态ip地址192.168.1.1(因为我固件编译时设置了192.168.30.99所以这里不是192.168.1.1), 对WAN口自动设置为DHCP,导致他从路由器请求了一个不是我们创建虚拟网卡设置的ip,因此我们需要手动修改 这里我们采取方法1来修改网络配置,执行vim /etc/config/network , 先看下默认配置
 1
 2
 3
 4
 5
 6
 7
 8
 9
10
11
12
13
14
15
16
17
18
19
20
21
22
23
24
25
26
config interface 'loopback'
        option device 'lo'
        option proto 'static'
        option ipaddr '127.0.0.1'
        option netmask '255.0.0.0'

config globals 'globals'
        option ula_prefix 'fd74:a5b5:4545::/48'

config device
        option name 'br-lan'
        option type 'bridge'
        list ports 'eth0'

config interface 'lan'
        option device 'br-lan'
        option proto 'static'
        option ipaddr '192.168.30.99'
        option netmask '255.255.255.0'
        option ip6assign '60'
        option dns '192.168.30.1'
        option gateway '192.168.30.1'

config interface 'wan'
        option device 'eth1'
        option proto 'dhcp'
option ipaddr 设置为你的maclan的ip 1
2
3
4
5
6
7
8
9
10
11
12
13
config device
        option name 'br-lan'
        option type 'bridge'
        list ports 'eth0'

config interface 'lan'
        option device 'br-lan'
        option proto 'static'
        option ipaddr '10.10.10.6'
        option netmask '255.255.255.0'
        option ip6assign '60'
        option dns '10.10.10.6'
        option gateway '10.10.10.6'
此时修改完成后,重启容器
1
docker compose restart openwrt
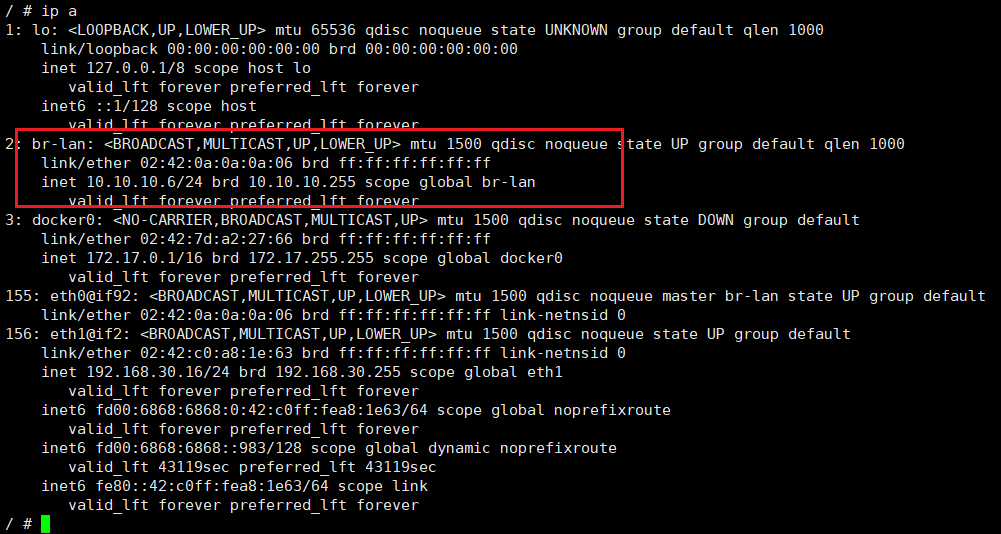
这时候再次进入容器,就可以看到我们设置的lan口ip地址了192.168.30.16的ip地址。所以WAN口实际上也可以不配置,甚至在创建macvlan的时候,你都不需要设置subnet和gateway。
其实不用修改也可以,默认DHCP就行了。
1
2
3
config interface 'wan'
        option device 'eth1'
        option proto 'dhcp'
如果非要修改
1
2
3
4
5
6
7
8
config interface 'wan'
        option device 'eth1'
        option proto 'static'
        option ipaddr '192.168.30.99'
        option netmask '255.255.255.0'
        option ip6assign '60'
        option dns '192.168.30.1'
        option gateway '192.168.30.1'
openwrt重启网络
1
/etc/init.d/network restart
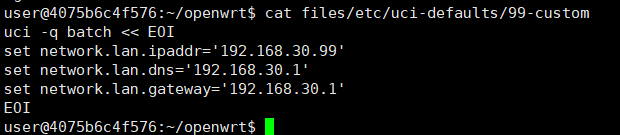
前面提到,要修改网络设置,要么预编译,要么手动修改,那么有没有办法覆盖掉编译时候的预设配置呢?当然是有的,可以在构建镜像的时候,通过Dockerfile的RUN指令添加自己的预定义脚本到/etc/uci-defaults/。
在docker-compose.yaml同级目录下编写Dockerfile文件,内容如下
如果是使用的是网络上的镜像
1
2
3
4
5
6
7
8
9
# 从别人的镜像创建
FROM piaoyizy/openwrt-x86

# 自定义配置
RUN echo "uci set network.wan.device='eth2' && uci commit" > /etc/uci-defaults/100-custo

EXPOSE 22 80 443 53 7681 5244
# 路由器初始化
ENTRYPOINT ["/sbin/init"]
如果是使用自己编译的镜像
 1
 2
 3
 4
 5
 6
 7
 8
 9
10
FROM scratch
#ADD /root/mybuild/openwrt/bin/targets/x86/generic/openwrt-x86-generic-generic-rootfs.tar.gz /
ADD openwrt-x86-64-generic-rootfs.tar.gz /
EXPOSE 22 80 443 53 7681 5244
RUN echo "uci set network.wan.device='eth2' \
        && uci set network.wan6.device='eth2' \
        && uci set firewall.@zone[1].input='ACCEPT' \
        && uci commit" > /etc/uci-defaults/100-custom

ENTRYPOINT ["/sbin/init"]
然后,把docker-compose.yaml文件的image注释掉,添加build: . ,表示从当前目录下的Dockerfile构建
1
2
3
4
5
6
7
version: '3'

services:
  openwrt:
    # image: piaoyizy/openwrt-x86
    build: .
    container_name: openwrt
此时创建容器需要先构建镜像
1
docker compose build && docker compose up -d
启动后就会发现,自定义配置生效了。
注意:官方openwrt旁路由模式有BUG,UDP数据不能转发,解决办法是开启Passwall
(先鸽) (以下文档尚未更新)
造成原因及解决方法说明
原因是部署 openWRT 系统时使用到了 docker 的 macvlan 模式,这个模式通俗一点讲就是在一张物理网卡上虚拟出两个虚拟网卡,具有不同的MAC地址,可以让宿主机和docker同时接入网络并且使用不同的ip,此时 docker 可以直接和同一网络下的其他设备直接通信,相当的方便,但是这种模式有一个问题,宿主机和容器是没办法直接进行网络通信的,如宿主机ping容器的ip,尽管他们属于同一网段,但是也是ping不通的,反过来也是。因为该模式在设计的时候,为了安全禁止了宿主机与容器的直接通信,不过解决的方法其实也很简单——宿主机虽然没办法直接和容器内的 macvlan 接口通信,但是只要在宿主机上再建立一个 macvlan,然后修改路由,使数据经由该 macvlan 传输到容器内的 macvlan 即可,macvlan 之间是可以互相通信的。
主机联通宿容器
1
2
3
4
ip link add macvlan-proxy link enx98fc84e631d8 type macvlan mode bridge
ip addr add 192.168.10.99 dev macvlan-proxy
ip link set macvlan-proxy up
ip route add 192.168.10.9 dev macvlan-proxy
这时候容器就可以通过 192.168.10.99 访问宿主机了。
1
docker exec openwrt bash -c 'ping 192.168.10.99 -c 3'
 1
 2
 3
 4
 5
 6
 7
 8
 9
10
oot@tignioj:~/dockercompose/openwrt# docker exec openwrt bash -c 'ping 192.168.10.99 -c 3'
PING 192.168.10.99 (192.168.10.99): 56 data bytes
64 bytes from 192.168.10.99: seq=0 ttl=64 time=0.088 ms
64 bytes from 192.168.10.99: seq=1 ttl=64 time=0.163 ms
64 bytes from 192.168.10.99: seq=2 ttl=64 time=0.166 ms

--- 192.168.10.99 ping statistics ---
3 packets transmitted, 3 packets received, 0% packet loss
round-trip min/avg/max = 0.088/0.139/0.166 ms
root@tignioj:~/dockercompose/openwrt#
如果不需要通信,则可以删除
1
2
ip link del macvlan-proxy link eno1 type macvlan mode bridge
ip addr del 192.168.31.99 dev macvlan-proxy
如果要让宿主机使用容器的网络,请添加默认网关
1
ip route add default via 192.168.10.9 dev macvlan-proxy
如果发现无法联网,需要去openwrt后台添加自定义防火墙规则
1
iptables -t nat -I POSTROUTING -o eth0 -j MASQUERADE
如果宿主机不想使用,可随时删掉默认网关
1
ip route del default via 192.168.10.9 dev macvlan-proxy
参考: